When in the field conducting environmental or ecological surveys, a record of events and subjects is often collected for future reporting and analysis. This has traditionally been a physical record, collected using pen and paper. In recent years, physical records are being digitised, and the process of data collection itself is now often digital. Digital records of events and observations in the field can now be collected using forms on mobile phones, even when the devices are offline.
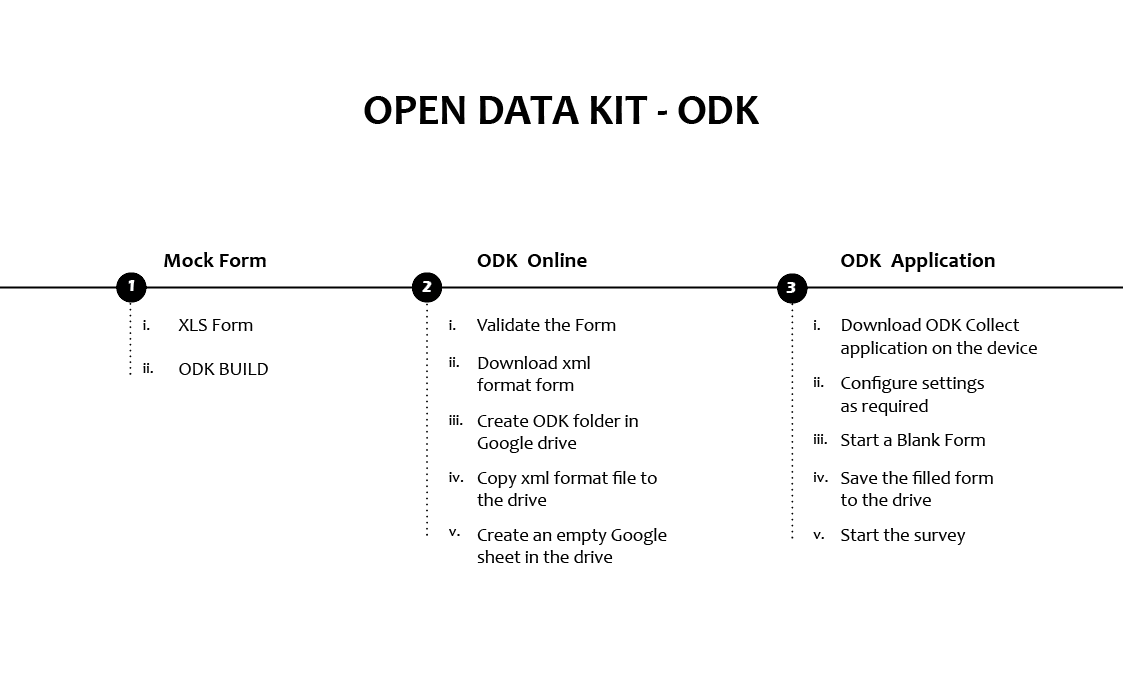
OpenDataKit (ODK) is a suite of open source tools that aids in the collection and storage of survey data, including audio, video and imagery among others. The form can be customised as necessary; for example, it can have mandatory questions, allow only specific inputs as responses and loop question threads. These features help reduce the inherent error in collecting data in the field. In this blog post, I will explain the customisation features and provide the steps to build a basic form in ODK.
ODK Flow Illustration
Getting started
There are two ways to create customised survey forms for ODK.
Using ODK Build.
Using XLS Form.
ODK Build is a browser-based tool that allows users to drag and drop blocks together to create forms. While it is a great way to begin using ODK, it is not as powerful or customisable as using the XLSForm method.
To use XLSForm, one needs access to the XLSForm software itself, which is free and open-source (Online version here and offline version here). Essentially, the user creates a form using spreadsheet software that outputs the .xls format, which can be accomplished with both MS Excel as well as with Google Sheets. This form is then processed through the XLSForm software, to create the mobile-friendly survey file (in .xml format). The form itself has to comply with a set format and syntax; for example, ‘type’, ‘name’ and ‘label’ are mandatory columns that must exist for the spreadsheet to be successfully converted into a form, while other columns are optional.
The basic format required is detailed in the XLSForm documentation (XLS Form document). In addition, I found this sheet called widgets quite helpful, as it provides an exhaustive list of options to populate the ‘type’ column.
Mock form using XLSForm
In this section, I’m sharing the steps of building a simple ODK form using XLS form. I’m assuming there’s a plot of trees owned by the surveyees. Now, say one wants to conduct a survey, to collect data of individual trees in the plot and data about the plot. I’ve listed a few probable questions which serve as good examples to build a customised form.
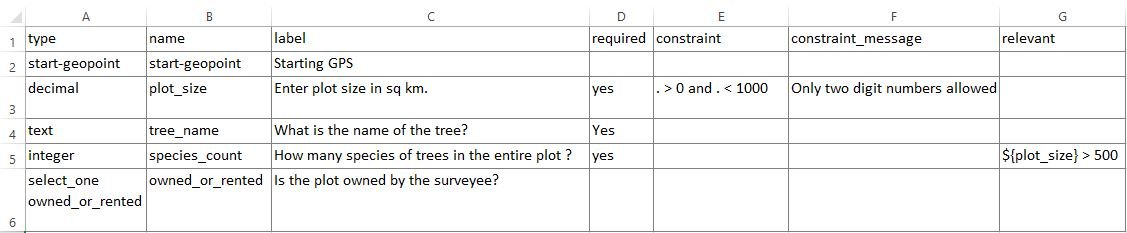
Open a new workbook/spreadsheet. Name the first three columns as ‘type’, ‘name’ and ‘label’. Name the worksheet as ‘survey’. All the column and worksheet names are case sensitive. The following question uses a ‘start-geopoint’ widget. This forces the android phone to start location service.

2. Using two more columns: ‘constraint’, ‘constraint_message’.

3. Add another column named ‘required’. Required indicates that it is a mandatory field/question. This question uses a text widget as shown under the type column.

4. Ask the following question only if the plot size is > 500 sq km and for that add another column ‘relevant’.

The above question is asked only if the plot size (previous question) is more than 500 - a conditional question. There are many ways of asking such questions. For example, one can repeat a set of questions based on certain conditions and other such. This is a type of dynamic form as questions change based on conditions.
5. Ask if the plot is owned or rented - a yes or no question - this is to give an example of using ‘choices’ worksheet. Leave the other columns (constraint,relevant, etc.) blank when not required.
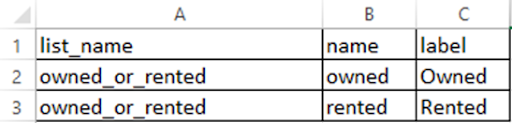
Create the choices worksheet as shown in the form definition template. Enter the following in the ‘choices’ worksheet.
Also take note of the ‘settings’ worksheet Fig3 - the ‘version’ column of this worksheet must be different for every draft of form for it to reflect the changes in the ODK Collect App.
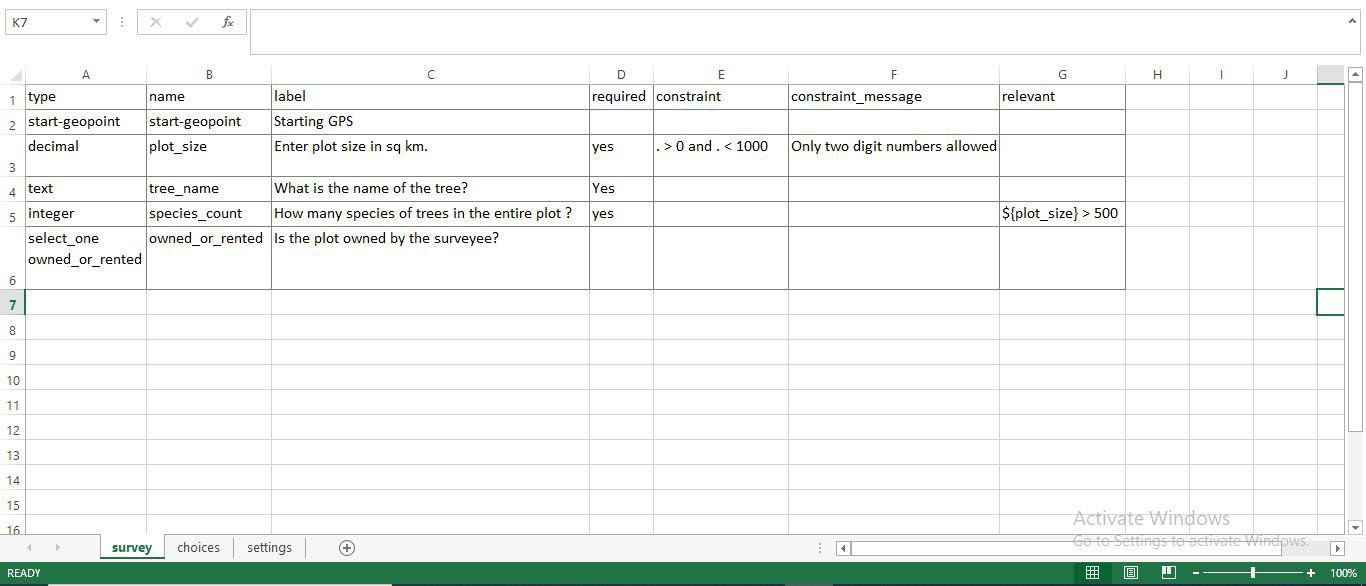
Fig. 01 Survey Worksheet

Fig. 02 Choices Worksheet

Fig. 03 Settings Worksheet
Mock form using ODK Build:
The easier way of building forms is by using ODK Build. Forms can be build by dragging and dropping appropriate widgets. One example is given below:

Fig. 04 ODK Build Mock Form
Use ‘Add New’ at the bottom left of the screen to add new rows of widgets. This toolbar contains the different types of widgets and is similar to populating the ‘type’ column of XLS Form. The properties of the widget can be described at the Property Dialogue box of each widget which opens to the right of the screen. Data name is similar to the ‘name’ column in XLS Form. Other conditions and columns like relevant, required, constraint etc can be added using the Property Dialogue Box. An example is shown above in Fig4. After the form is built, one can export the form to XLS Form or XML Form using the File menu as shown below in Fig5.
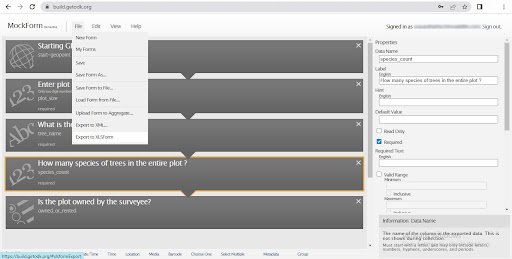
Fig. 05 ODK Build - File Menu
Although syntax dependent, I found the XLS Form method to be more robust in terms of building the form and rectifying the errors. The XML form obtained through ODK Build is not necessarily error free. If you are using the XML Form from ODK Build without going through the Form Validation step described below, there is a possibility that the form will have errors in the ODK Collect App or while collecting the data. Hence, it is advisable to download the XLS Form from the ODK Build and follow the steps below to validate the form and then input it to the ODK Collect Mobile application.
Form Validation:
After the completion of the form, go to ODK Online and choose your .xlsx format form for submission. If you have built the form in google sheets, you must download it in .xlsx format and run it through the validation. Any errors in the form are displayed here after clicking on submit. Rectify the errors and submit again until ‘Preview in Browser’ and ‘Download XForm’ options appear as shown in Fig6. A point to note here is that the form is debugged line by line in ODK Online. Hence, each time an error pops up it must be rectified and submitted again. All the errors are not shown at once so it would be a good idea to make the .xlsx format as default for the form as mentioned earlier. Check the preview and validate the form. Then, click on ‘Download XForm’ and the XML file of the form will be downloaded.
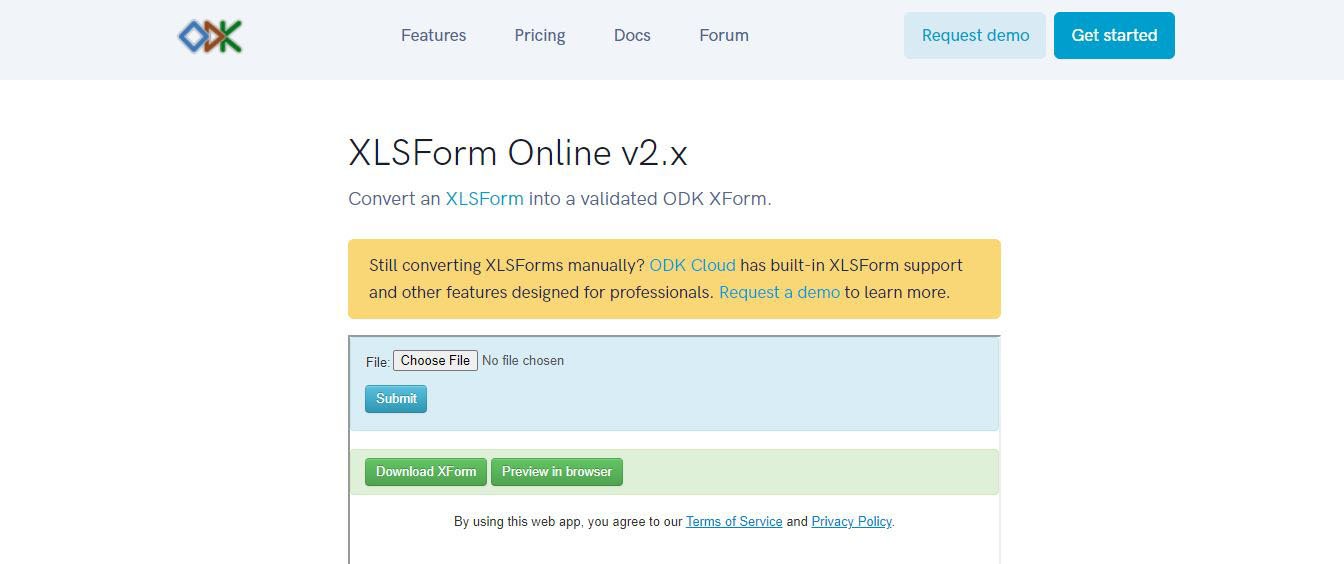
Fig. 06 Form validation
Connecting to Google Drive:
Once the form is ready to be used for data collection, we need to connect it to the ODK Collect Mobile App. For that, go to your google drive and create a folder for ODK forms. Upload the previously downloaded xml form in it. Then create an empty google sheet in which the responses of the survey will be collected.
ODK Collect Mobile App set up:
Download and install ODK Collect from Google Play Store. Please note that, ODK Collect App is only Android compatible.
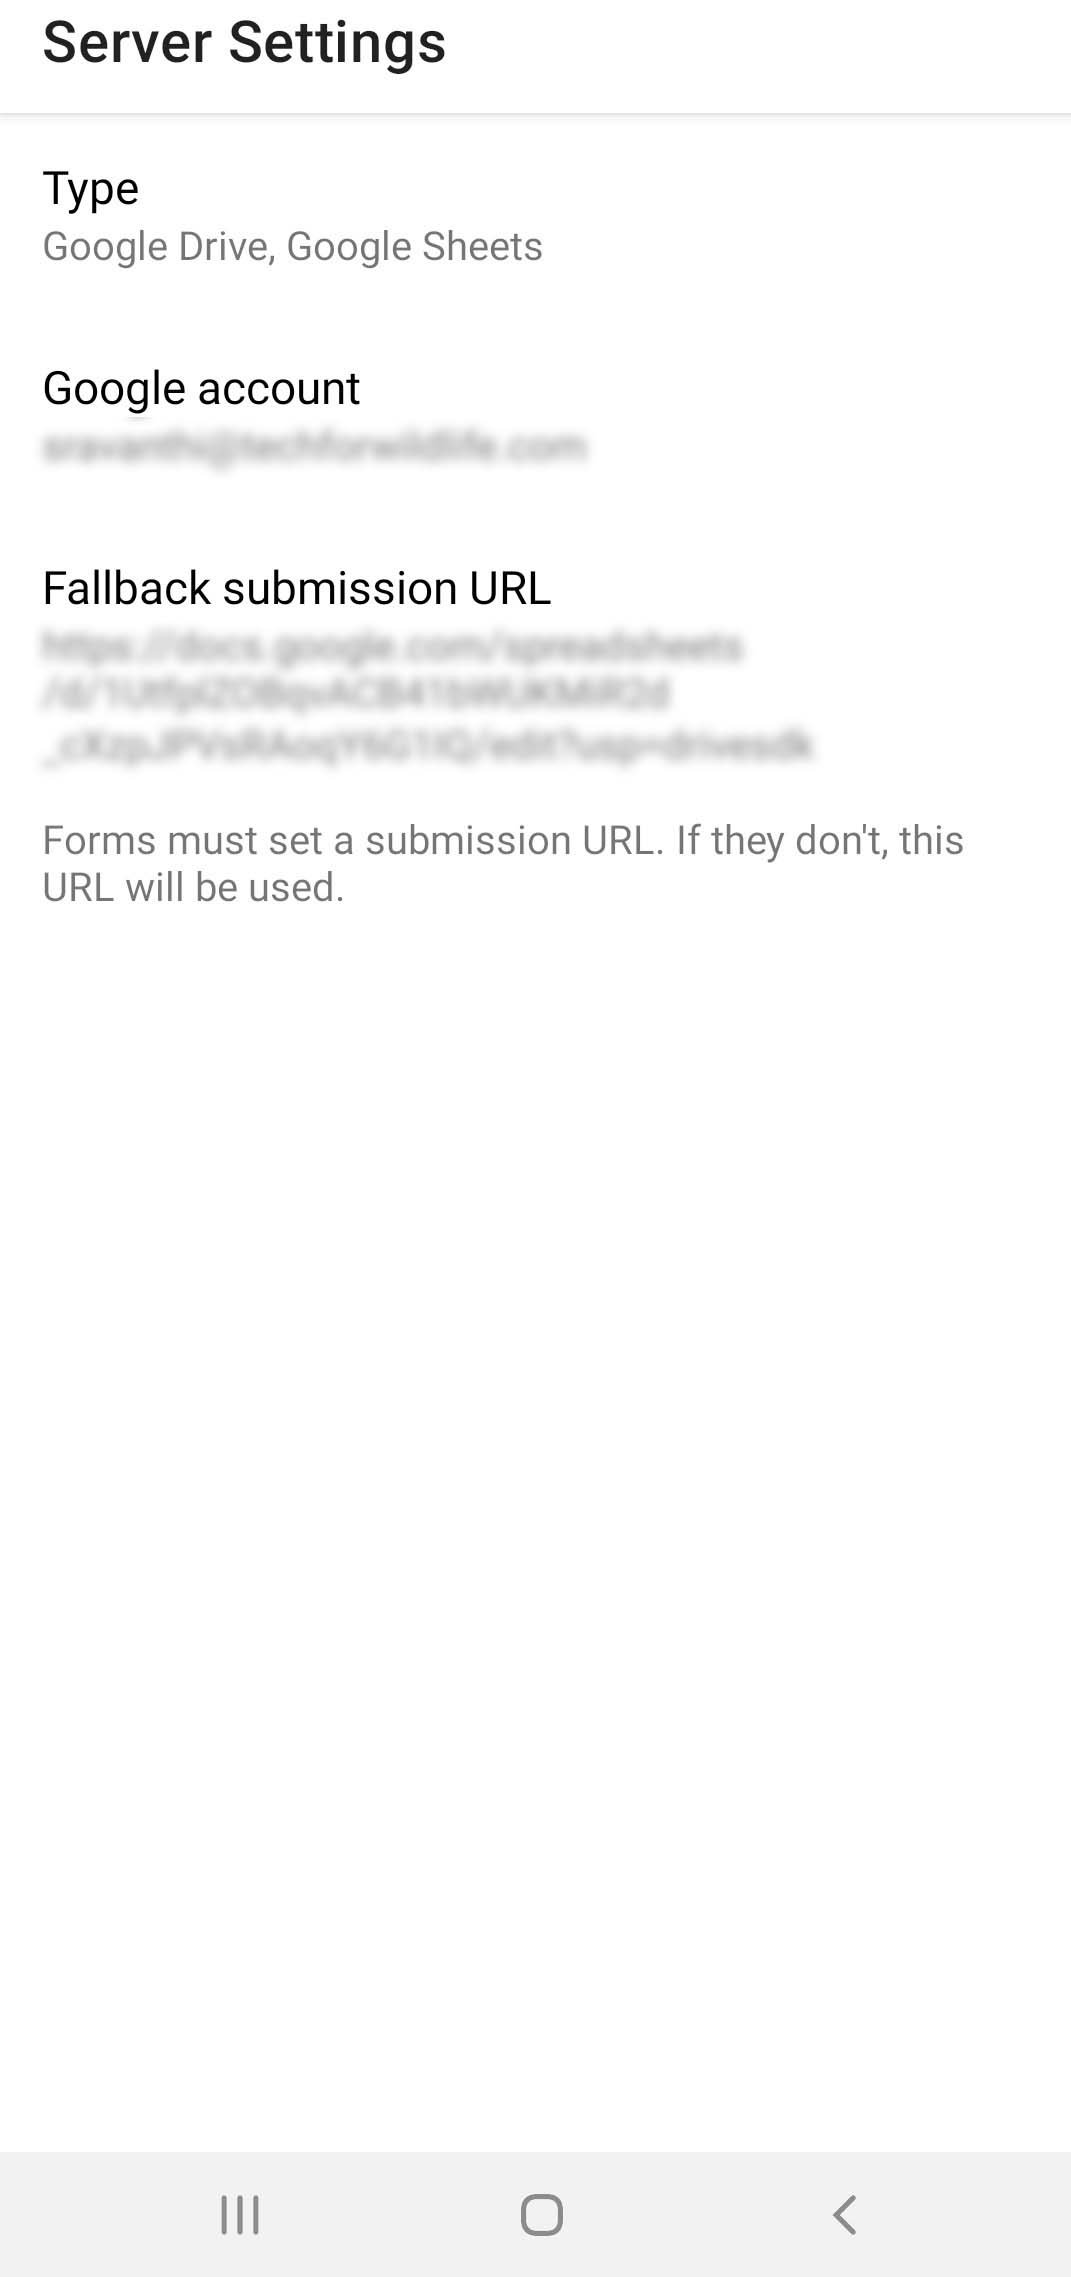
Fig. 07 Server settings
As soon as you open the app after installation, the server settings must be configured as shown in Fig7 after selecting ‘Manually enter project details’.
Type - must be selected as Google Drive, Google Sheets if it's not set by default.
Google account - Enter the google account of the google drive which will be used to collect and store survey data.
Fallback submission URL - share the URL of the empty google sheet which was created in the google drive in the above step. This step ensures that all the collected data is sent to the mentioned submission URL.
If using ODK Build, then one can set the submission URL in the Edit menu → Form Properties as shown in Fig8.
One can also use the QR code method to configure the settings 8
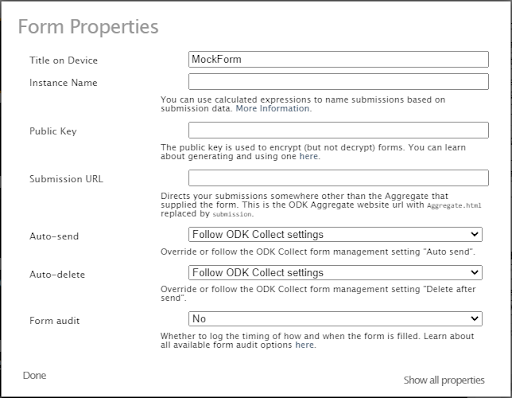
Fig. 08 Form Properties - ODK Build
Survey from Mobile:
Once the settings are configured, it is time to get the form and collect data. For that,

Fig. 09 Main menu

Fig. 10 Select xml.
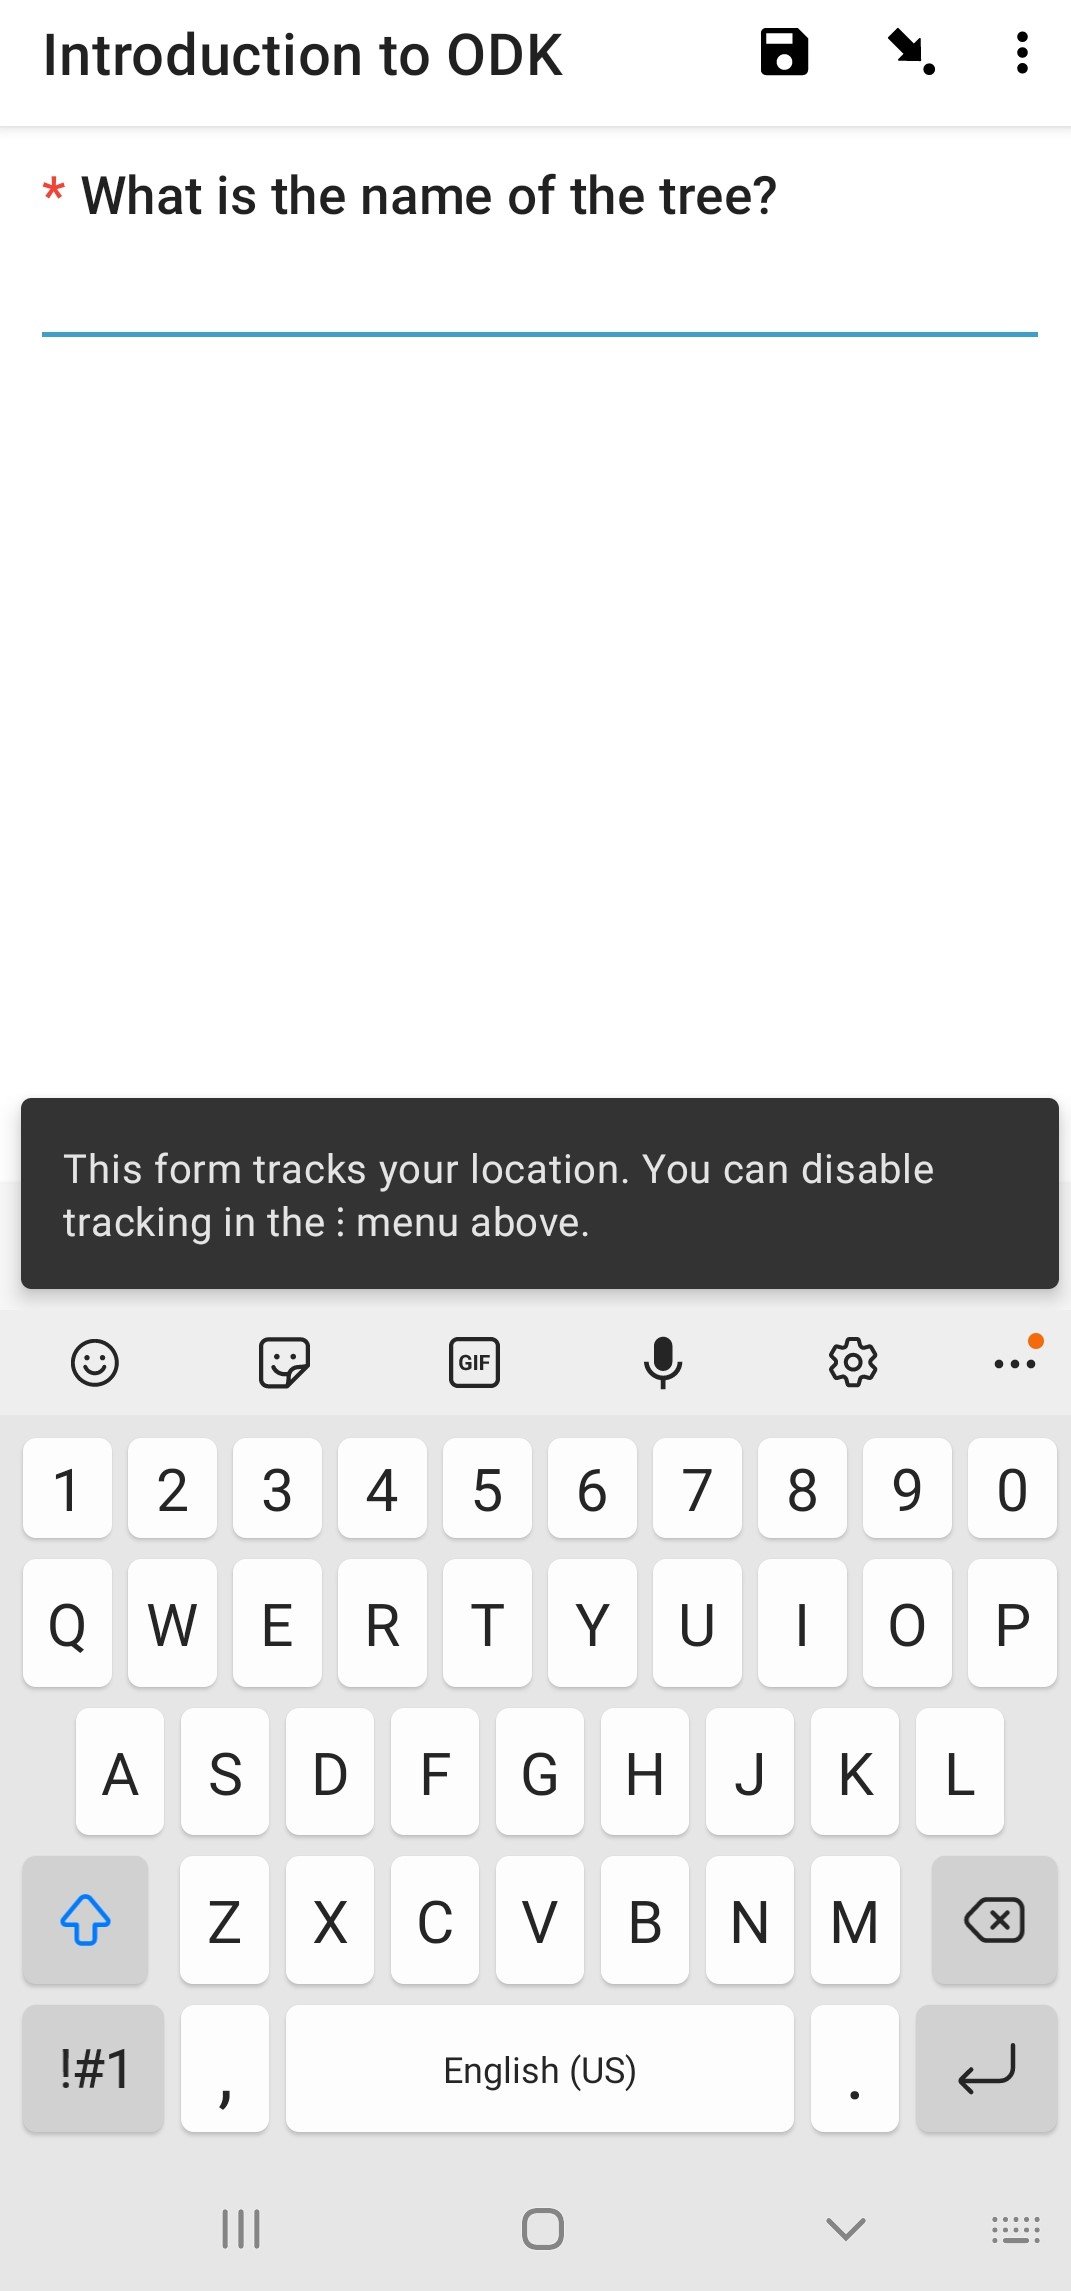
Fig. 11 Fill Blank Form
Select ‘Get Blank Form’ from the Main menu in Fig9.
Under that select the ODK folder created in the previous step - Select the xml form and click on ‘Download selected’.
When you receive the ‘download successful’ message, go back to the main menu in the form and now select ‘Fill Blank Form’ from the Main Menu. Once the form is filled, go to ‘Send Finalised Form’ in the main menu and click on Send, alternatively you can also automate the sending of forms under - Account - Project Settings - Form management - Form submission Options.
Go to your empty google sheet in the ODK folder and check how the responses have been recorded. Take note of the column names - these are the names entered in the ‘name’ column in your ‘survey’ worksheet. Tweak the survey form (column names, relevant questions etc) in accordance with the response sheet so that post survey analysis is free of confusion. Exploit the ‘calculation’, ‘appearance’, ‘hint’ and other columns which will make the survey precise.
Other essentials on ODK:
The official use cases and examples of all widgets are provided here. If you want to design a basic form using drag and drop functionality - ODK build is the way to go. However, this is not as customizable as the XLSForm method. Read more on ODK Central for setting up ODK on a larger scale.